
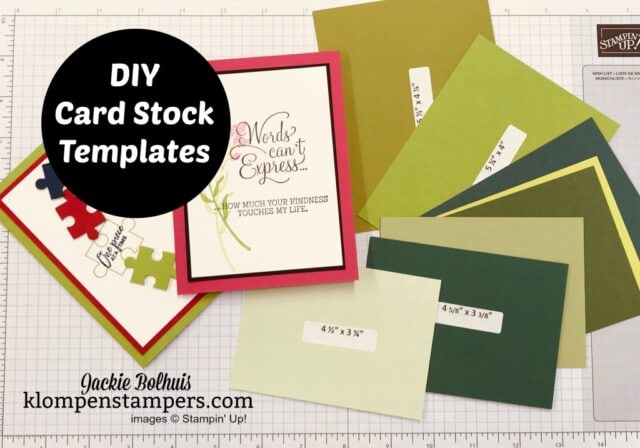
One of the first things you need to learn when beginning to make your own greeting cards is how to cut card stock. Most of the time, you will have sheets of card stock that are 8 1/2 X 11 and when cut properly, each sheet will make two cards.
In this article, you will learn how to cut card stock to make your card bases, as well as how to determine what size to cut the layers you add to your card base. I have a simple way to figure out the size of the layers to share with you. Make sure to check out the video to understand how to cut them, and also how to make a set of card stock layering templates to assist you when you make your cards.
How to Cut Card Stock For the Card Base
A full sheet of 8 1/2 x 11″ card stock will make 2 cards. You simply want to cut it in half in either direction. You can cut the “long” way, or the “short” way, and when folded it will create the exact same sized card. It’s just a matter as to how you want it to open and close.
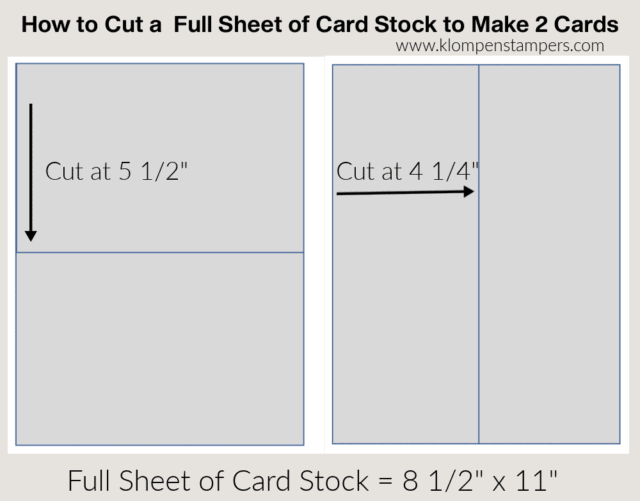
If you cut it the “long” way, at 4 1/4″, you will then score it at 5 1/2″ to make a nice crisp center fold. If you cut the “short” way, score at 4 1/4″ to fold it in half.
No matter which way you cut and fold, the front of the card will be 5 1/2″ x 4 1/4″. That is the size the layering templates are designed to work with and is the standard size card. These cards will fit in the Stampin’ Up! medium-sized envelopes.
How to Cut Card Stock For the Layers
Whether you want one layer on your card or multiples, I have an easy way to teach you how to figure out the sizes of these layers. I like things proportionate, so I tend to use pretty standard measurements when I cut my card stock. I have created a set of templates with my main sizes that help me when designing a card. I have included the measurements below so that you can make these templates also. They will definitely help you figure out the sizes to cut your layers as you are creating.
These templates are designed to be “proportionate” layers. That means that when layering them, they will have the same size of a border all the way around the layers when stacked together. Now, remember, this is not a “must,” but rather a way I like to create. So if you like things nice and event, these measurements will be perfect for you.
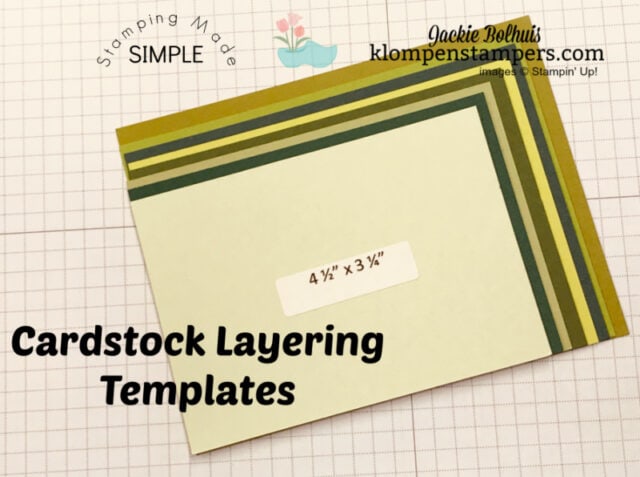
Sizes to Cut Layers (& Make the Templates)
- 5 1/2″ x 4 1/4″ (card front size)
- 5 1/4″ x 4″
- 5 1/8″ x 3 7/8″
- 5″ x 3 3/4″
- 4 7/8″ x 3 5/8″
- 4 3/4″ x 3 1/2″
- 4 5/8″ x 3 3/8″
- 4 1/2″ x 3 1/4″
These are the main measurements that are most often used as layers on cards. If you cut these sizes and label them, you can then play around with the different sizes when you are making cards.
Lay the different sizes on your card design to see what you like best. And then figure out what other sizes to use for layer.
Video Tutorial – Card Stock Cutting Templates
This video will explain how to make these templates and how to determine what sizes to use on your cards.
March 2026 Specials & Happenings
Learn About All Specials & Happenings

Thank you so much for visiting my website today! I hope you enjoyed this quick and easy card making project. If you did, please leave us a comment below! If you have any questions, I would love to help you and answer them, just follow the link below to contact me. If you would like to place a Stampin’ Up! order, I would be thrilled if you selected me to be your demonstrator.
Contact Jackie | More Project Ideas | Card Tutorials | Stay Up To Date on Happenings
Browse Stampin’ Up! Catalogs | Shop Stampin’ Up! Products | Learn How to Shop at a Discount

Want more card making inspiration? Follow me on all my social channels.